Printer Locations
There are shared printers located in each building and on most floors. See below for building, floor, type and room number for the printers.
| Burt | Dawes | Nypro | Ocean Observing Center |
Strand | Western Avenue |
Wilkinson | Wenger |
|---|---|---|---|---|---|---|---|
|
Burt127c-Color Burt 127c-Copier Burt290a-Color Burt290a-Copier Burt326-Color Burt428-Color Burt428-Copier |
Dawes-Color | Nypro-Color |
OOC-Copier OOC-Tabloid |
Stag332-Color Stag344-Color Stag344-Copier |
Wa224-Color |
Wilk016-Color Wilk102-Color Wilk104-Color Wilk201-Color Wilk201-Tabloid |
Wngr502-Color Wngr518b-Color Wngr518b-Copier |
Regular Printing
-
Adding CEOAS Printers to Windows
- To print to college printers in CEOAS using Windows, you’ll need to connect to the college print server and setup a local print queue that connects to a print queue on the print server.
- To start, open Windows Explorer, and in the location field type: \\ceoas-print.ceoas.oregonstate.edu
Image
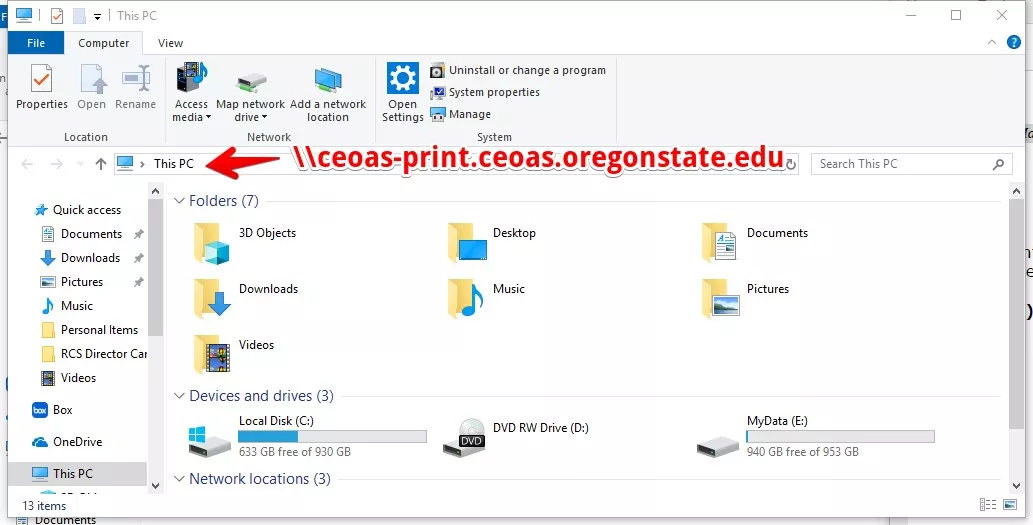
- Please note: if you are not attached to OSU’s Windows Active Directory (OSU AD), you’ll be prompted for a username and password. You’ll need to use your ONID credentials for this, and specify your domain, which in this case is ‘onid’, e.g.,
- Login name: onid\<onid username>
- Password: <onid password>
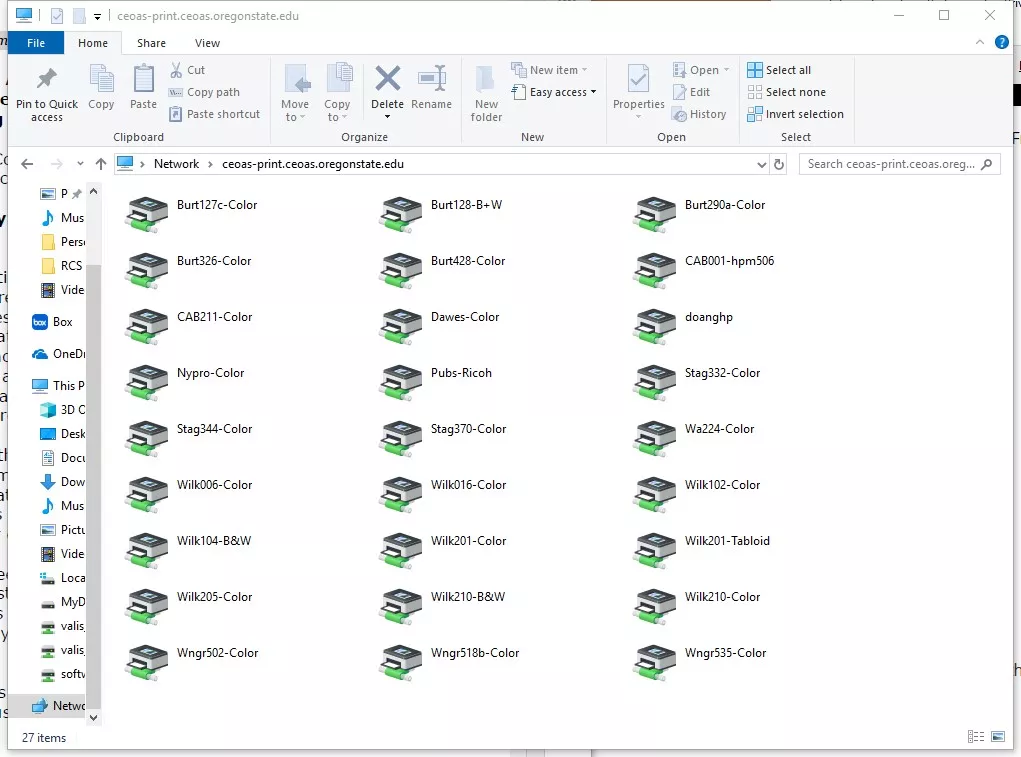
- There is typically a pause while you get logged in. Once you’re logged in, the screen should change to look like:
Image
-
From this, double-click on the printer you want to setup a queue for. A small window will briefly appear that will indicate printer drivers being installed and a local print queue is being setup. Once it is finished, a small window of the newly created local print queue will appear:
Image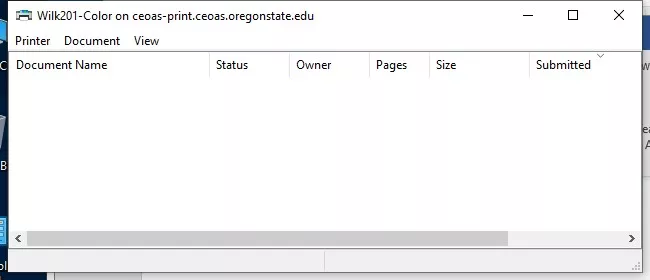
- You should then open an item you want to print and try printing. For longer documents, you should see it appear in your print queue:
Image
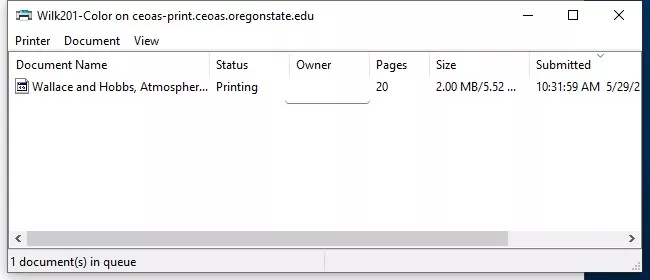
- Once it is finished, it should disappear from the print queue, and your printout should be ready at the printer.
-
Adding CEOAS Printers To Mac OSX (Pre Big Sur)
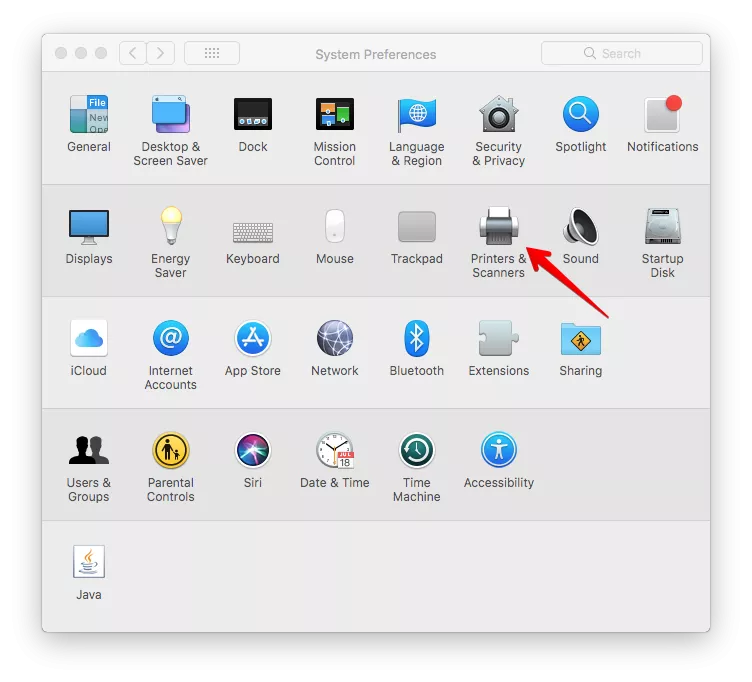
- Open Printers and Scanners in System Preferences.
Image
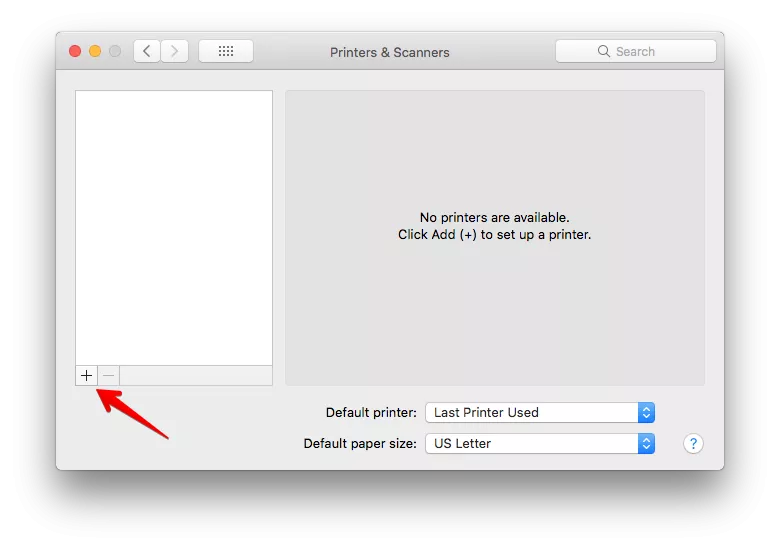
- Click the + button to add a new printer.
Image
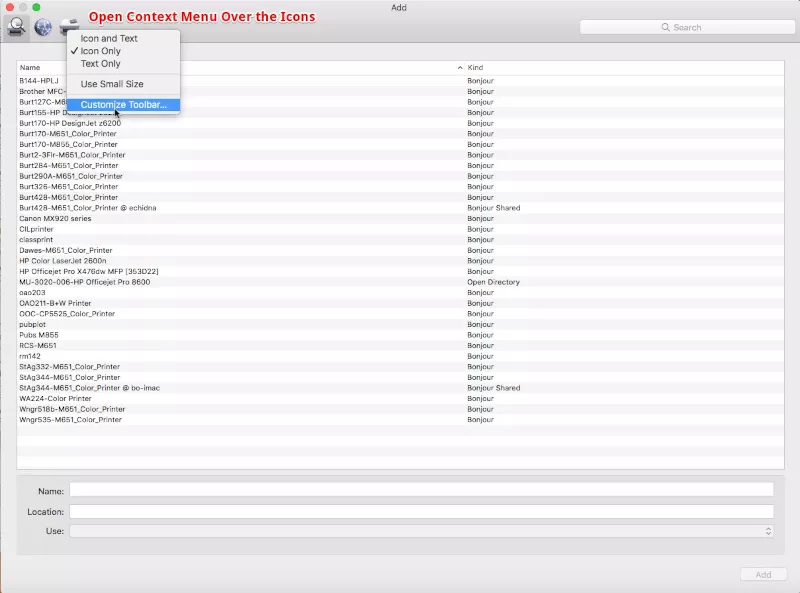
- Right Click/Option Click/Two Finger Click an icon in the top left to open the context menu and choose “Customize Toolbar”. This only needs to be done once.
Image
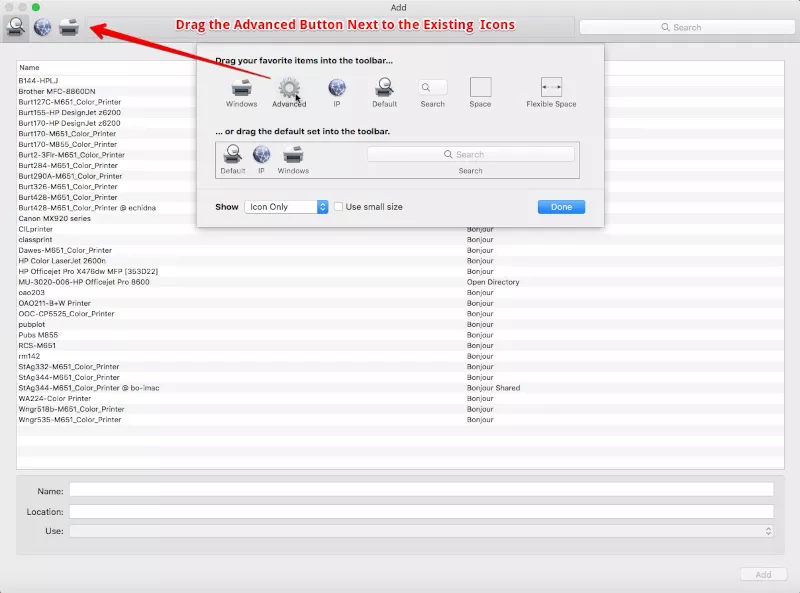
- Drag the Advanced icon to the right of the existing icons in the top left, again this only needs to be done once.
Image
- Click on the Advanced icon, then fill out the fields as shown. The URL starts with: "smb://ceoas-print.ceoas.oregonstate.edu/" followed by the name of a printer from the table above and then "?encryption=no".
- The printer name is case-sensitive!
- URL example:
smb://ceoas-print.ceoas.oregonstate.edu/NameOfPrinterFromList?encryption=no
- URL example:
- Also, be sure to use “Generic PostScript Printer”.
- Refer to the list above for printer name and remember printer names are case sensitive.
Image
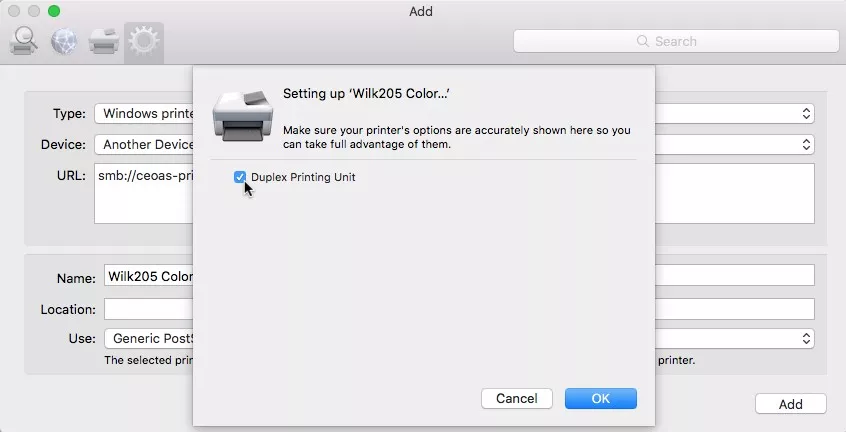
- Be sure to enable Duplex Printing Unit to allow for double sided printing.
- There is a current issue with some of the latest updates to MacOS that breaks printing to Windows print servers. If, after a MacOS update your printing breaks, try removing and re-adding your printer with "?encryption=no" added to the end as shown above.
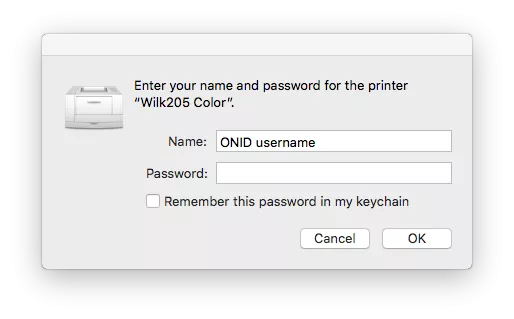
- After trying your first print job, you will be asked for a username and password. Enter your ONID username and password here. If the printing attempt fails with a “Holding for Authentication” error, that means that you’ve entered your username and/or password incorrectly. Try printing again and entering the correct ONID username and password. Once you are sure that it’s working, you can check the “Remember this password in my keychain” option.
Image
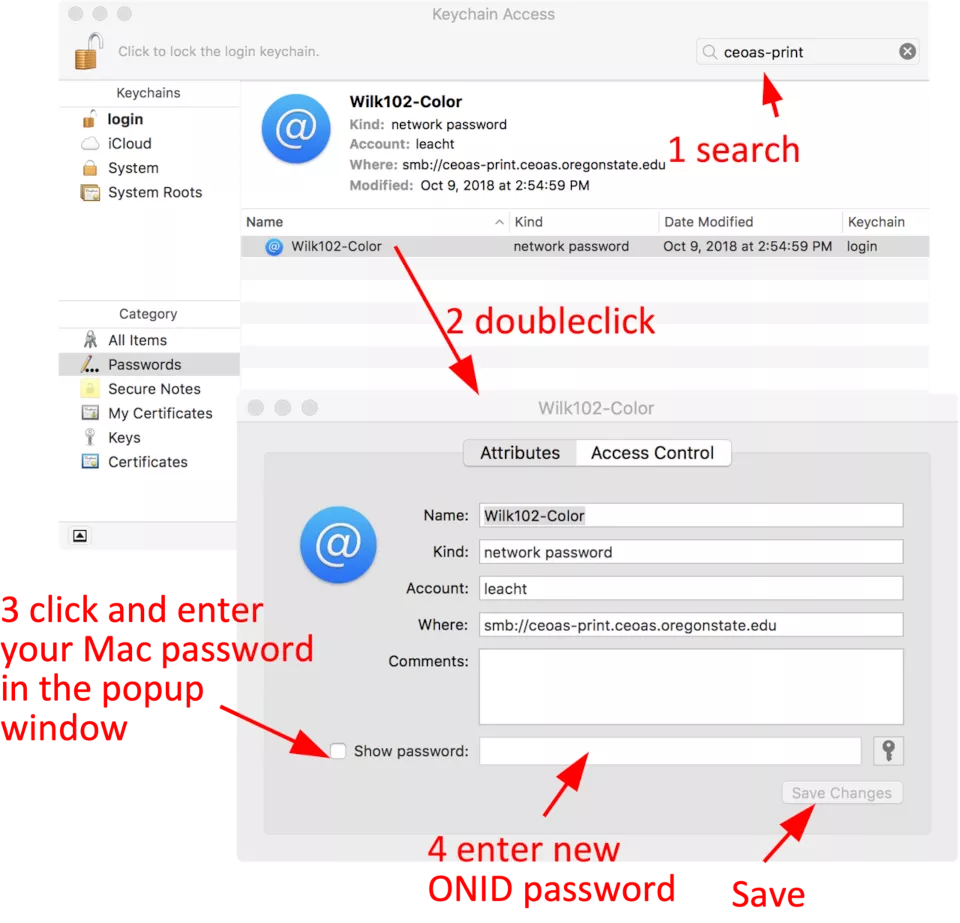
- If you have selected the “Remember this password” option and then later change your ONID password, you -must- use the Keychain Access app (Applications>Utilities>Keychain Access) and update the saved password. Launch the app, enter ‘ceoas-print’ in the search box. Double click on the resulting printer name (it will be the name of the first printer you added from ceoas-print), click the ‘Show password’ box, enter the password for your account on your Mac and click Allow. You will now see your old ONID password in the password field and you can change it to your new one. Don’t forget to click the Save Changes button when you are finished.
Image
- Open Printers and Scanners in System Preferences.
-
Adding CEOAS Printers to Mac OSX (After Big Sur)
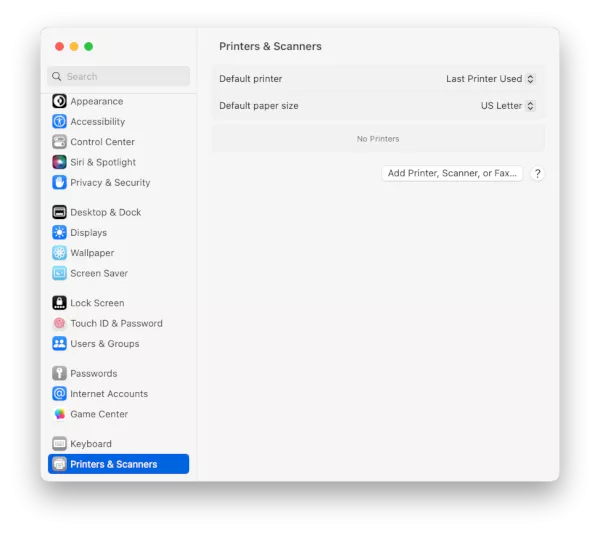
- Open Printers and Scanners in System Preferences.
- Click the 'Add Printer, Scanner or Fax...' button to add a new printer.
-
Image
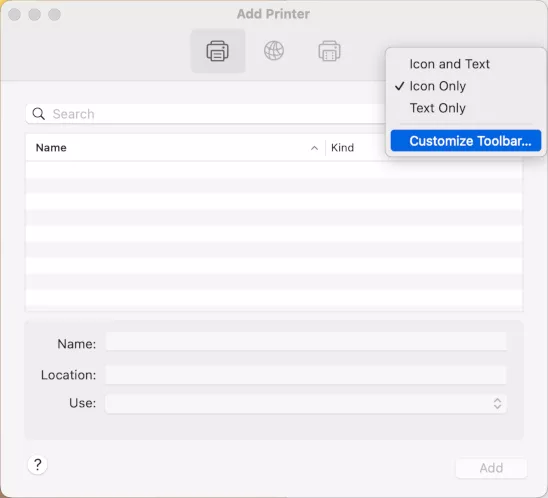
- Right Click/Option Click/Two Finger Click an icon in the top left to open the context menu and choose “Customize Toolbar”. This only needs to be done once.
Image
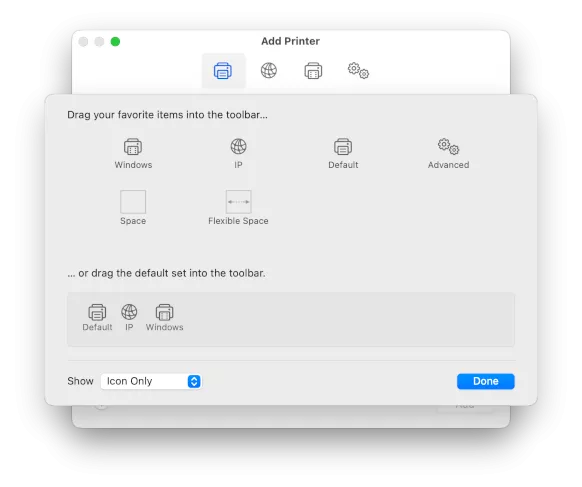
- Drag the Advanced icon to the right of the existing icons in the top left, again this only needs to be done once.
Image
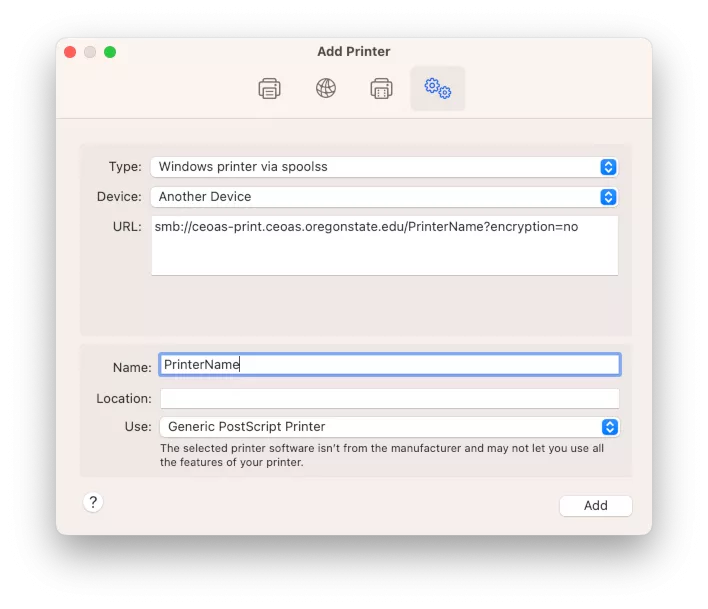
- Click on the Advanced icon, then fill out the fields as shown. The URL starts with: "smb://ceoas-print.ceoas.oregonstate.edu/" followed by the name of the printer listed on the next page and then "?encryption=no".
- The printer name is case-sensitive!
- URL example:
smb://ceoas-print.ceoas.oregonstate.edu/NameOfPrinterFromList?encryption=no
- URL example:
- Also, be sure to use “Generic PostScript Printer”.
- Refer to the list above for printer name and remember printer names are case sensitive.
Image
- Be sure to enable Duplex Printing Unit to allow for double sided printing.
- There is a current issue with some of the latest updates to MacOS that breaks printing to Windows print servers. If, after a MacOS update your printing breaks, try removing and re-adding your printer with "?encryption=no" added to the end as shown above.
- After trying your first print job, you will be asked for a username and password. Enter your ONID username and password here. If the printing attempt fails with a “Holding for Authentication” error, that means that you’ve entered your username and/or password incorrectly. Try printing again and entering the correct ONID username and password. Once you are sure that it’s working, you can check the “Remember this password in my keychain” option.
Image
- If you have selected the “Remember this password” option and then later change your ONID password, you -must- use the Keychain Access app (Applications>Utilities>Keychain Access) and update the saved password. Launch the app, enter ‘ceoas-print’ in the search box. Double click on the resulting printer name (it will be the name of the first printer you added from ceoas-print), click the ‘Show password’ box, enter the password for your account on your Mac and click Allow. You will now see your old ONID password in the password field and you can change it to your new one. Don’t forget to click the Save Changes button when you are finished.
Image
-
Tabloid Printing
- Please contact RACS "Support" for help with the Tabloid printing.
- Please contact RACS "Support" for help with the Tabloid printing.
-
Braille Embossing Printer
- CEOAS does have a Generation 2 – Power-Dot Braille Embossing printer from Viewplus along with the IVEO 3 Hands-On Learning System. Please contact the RACS "Support" using the request form for access to the equipment.
- CEOAS does have a Generation 2 – Power-Dot Braille Embossing printer from Viewplus along with the IVEO 3 Hands-On Learning System. Please contact the RACS "Support" using the request form for access to the equipment.
-
Copiers
- There are several Ricoh B&W copy machines in CEOAS spaces. They are located in:
- CEOAS Admin 101
- CEOAS Admin S201 ( at the top of the main stairs to the second floor)
- CEOAS Admin 211
- Burt 127C
- Burt 290A
- Burt 428
- Weniger 518B
- Strand 344
- Wilkinson 104 (Student Services)
- Western 101A
- OOC
- The copiers are managed by OSU Printing and Mailing Services. If you experience any issues with the copiers please contact the RACS "Support" using the request form and will will notify them of the problem.
- There are several Ricoh B&W copy machines in CEOAS spaces. They are located in:
-
Scanners
- There are several scanners located in CEOAS spaces. Typically they are Epson 10000XL wide-format scanners with a 12"x17". Scanners can be found in the following locations:
- Wilkinson 210 (Digital Earth Lab)
- Wilkinson 208 (Auxiliary computer lab)
- Wilkinson 016 (Auxiliary computer lab)
- Strand 332
- Please make sure that the scanner is clean after use and absolutely no scanning of rocks, as they will scratch the glass.
- If you experience any issues with the scanners, or if the Epson scan software does not seem to be installed, please contact the RACS "Support" using the request form.
- There are several scanners located in CEOAS spaces. Typically they are Epson 10000XL wide-format scanners with a 12"x17". Scanners can be found in the following locations:
-
Plotting Services
- CEOAS has two HP Z6200 plotters and one HP Z5400 plotter. We can work with users to print posters on universal coated paper. This is a lightweight paper that is suitable for conference posters. If you need something printed on a heavy weight paper, photo paper, Tyvek, Vellum or other specialty media please contact RACS to discuss options. There may be a fee for specialty products.
- Class Plots: CEOAS plotters are available for students in CEOAS courses to have each student print a single poster per class. This is not for test prints and is focused on large or end of class projects. Please do not abuse this service.
- Research Plots: Researchers are provided access to have large posters printed for conferences and meetings. Please contact the RACS group directly with your needs and we can help you format and ensure your poster will look good before printing.
- Plotting Guidelines:
- All posters should be in .PDF format and poster related questions should be submitted to posters@ceoas.oregonstate.edu.
- Please submit posters 48 hours in advance. This is essential to ensure that someone is available to print them in time.
- The maximum width of our plotters is 42". One dimension of the poster must be 42" or less. The other dimension is not critical.
- Please limit the use of dark or saturated background to help conserve ink.
- CEOAS has two HP Z6200 plotters and one HP Z5400 plotter. We can work with users to print posters on universal coated paper. This is a lightweight paper that is suitable for conference posters. If you need something printed on a heavy weight paper, photo paper, Tyvek, Vellum or other specialty media please contact RACS to discuss options. There may be a fee for specialty products.