Lets Get Started | Connecting to CEOAS Collection | Installing and Configuring Globus Personal Connect | Creating a Local Collection | Adding and Transferring Files | Sharing Files

Globus lets you efficiently, securely, and reliably transfer data directly between systems separated by an office wall or an ocean. It provides a pathway to securely access/move data between systems and share data with collaborators much faster than other file transfer tools such as rsync and SFTP. It also allows a user to start a number of file transfers at the same time with options to restart or resume failed/paused transfers without having to resend data that's already been moved. This guide will cover how to access Globus, how to connect to collections, and establish collections of your own.
Before you can use Globus with CEOAS provided network storage your account needs to be enabled. Please contact RACS support (support@ceoas.oregonstate.edu) for authorization.
Definitions:
- Collection: A named location containing data you can access with Globus.
- File Manager: A tool used to transfer files between collections.
- Endpoint: A server or workstation that hosts collections.
- Bookmark: Quick links you setup to navigate between collections.
- Panels: Used to organize the view of collections you are currently connected to.
- Globus Connect Personal: software package installed on your computer that facilitates the creation of a local collection.
- Link: Used to share data, both publicly and privately.
First, head to https://www.globus.org and look for where it says "Log In" up at the top right part of the screen. In the next screen, type "Oregon State University" in the block that states "Look-up your organization...". It should look like the following:

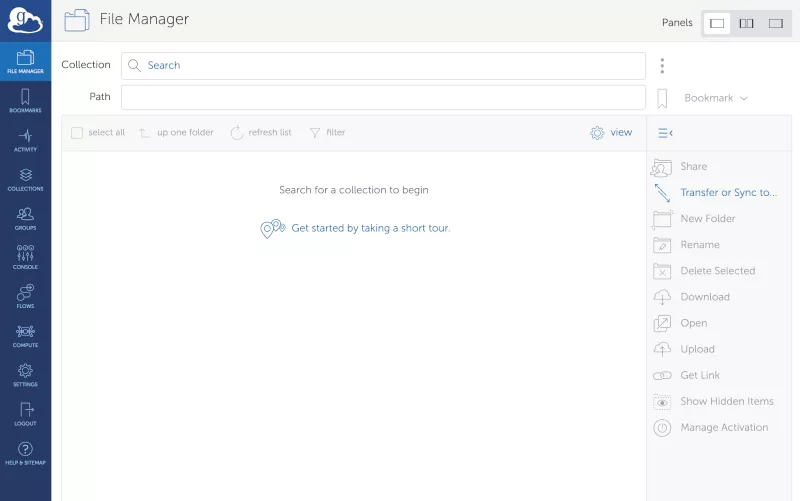
Then click "Continue" which will bump you over to an OSU authentication window. Log in with your ONID credentials and go through the steps needed to authenticate using Duo. After you successfully login you will end up at the File Manager.
Connecting to CEOAS Collection
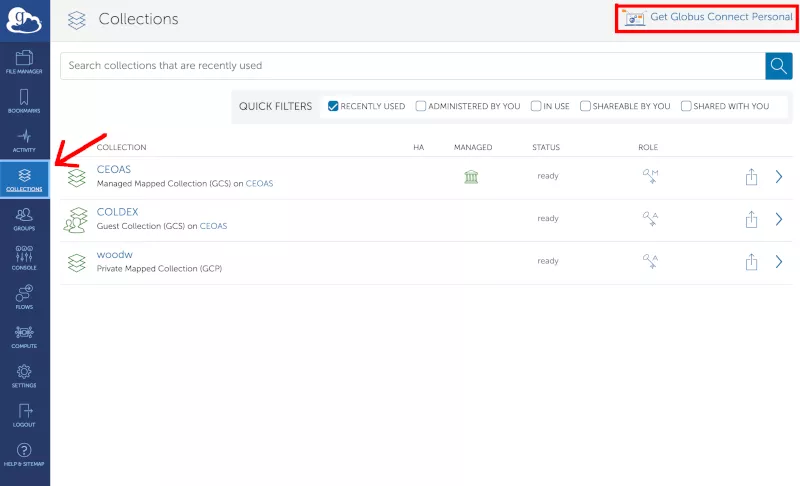
On the Globus website click on Collections in the menu on the left. This is used to search for collections setup using Globus. You can also select Quick Filters to quickly find collections you've recently used, shared, own, or collections that have been shared to you.
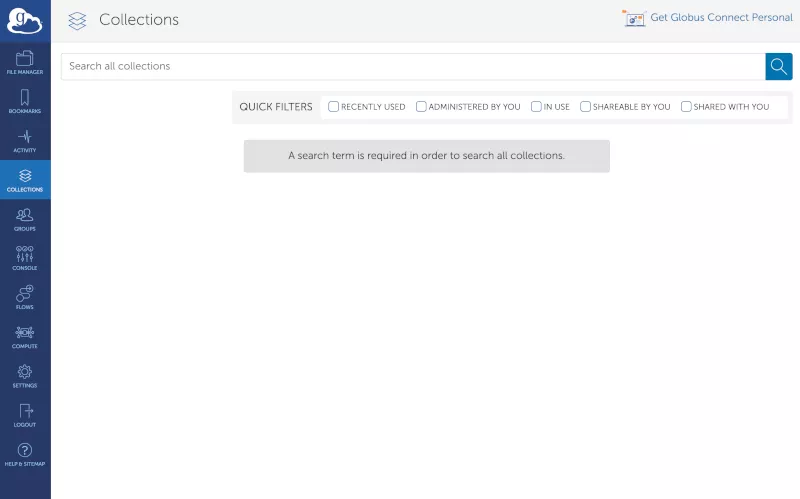
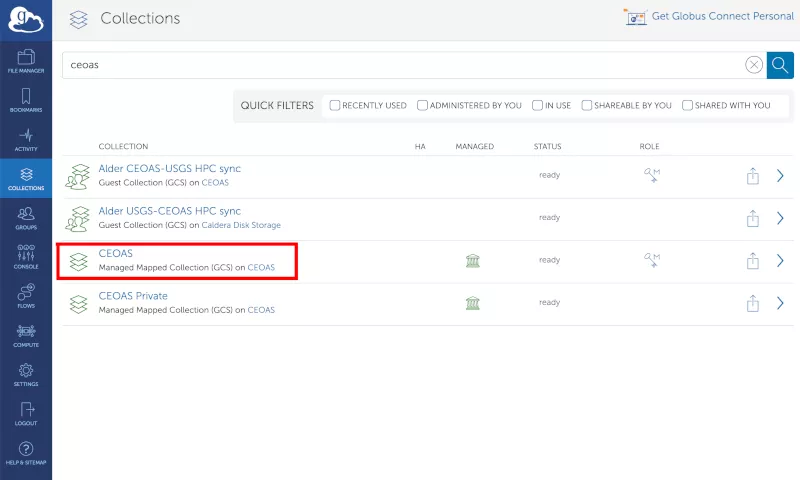
In the search box type "CEOAS" to find the CEOAS Globus collection. Click on the collection which will take you to the collection's main page.
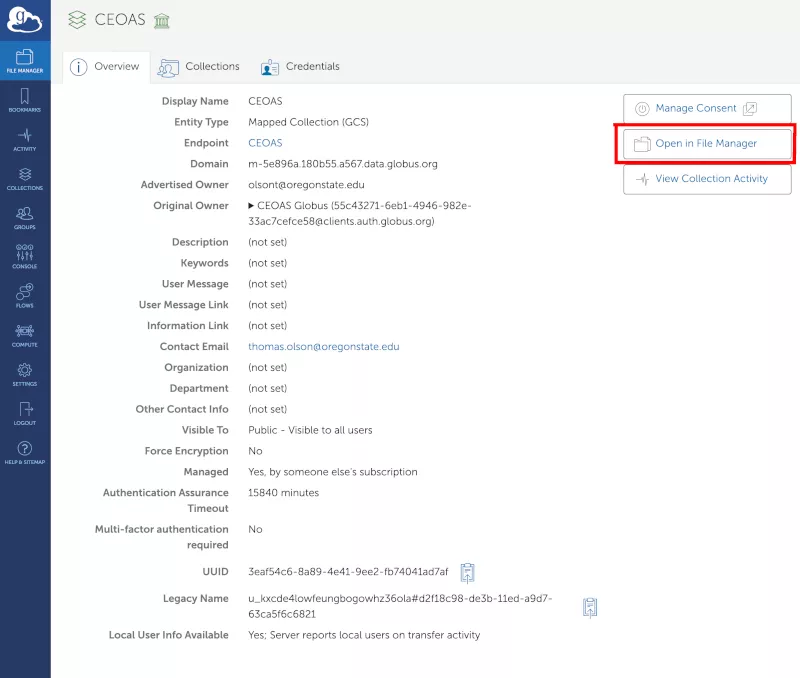
To access the File Manager for the collection select "Open in File Manager".
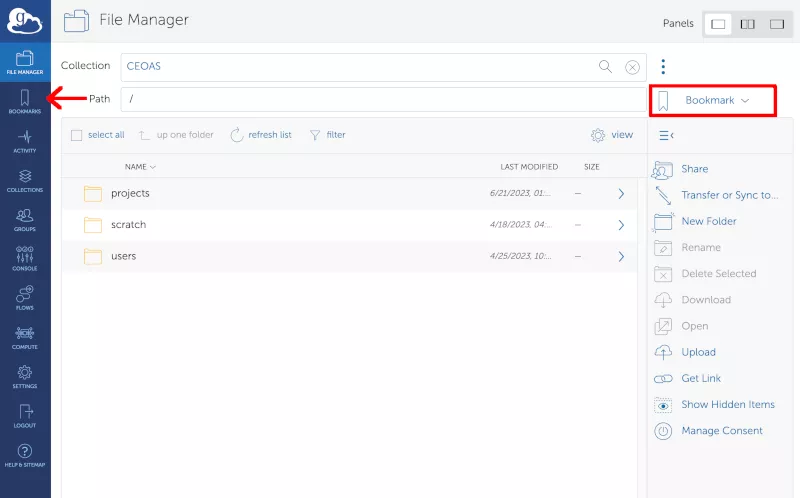
The File Manager will display the contents of the CEOAS collection. To quickly access this again you can click on the Bookmark link to create a bookmark. Saved bookmarks can be found under the Bookmarks link on the left menu.
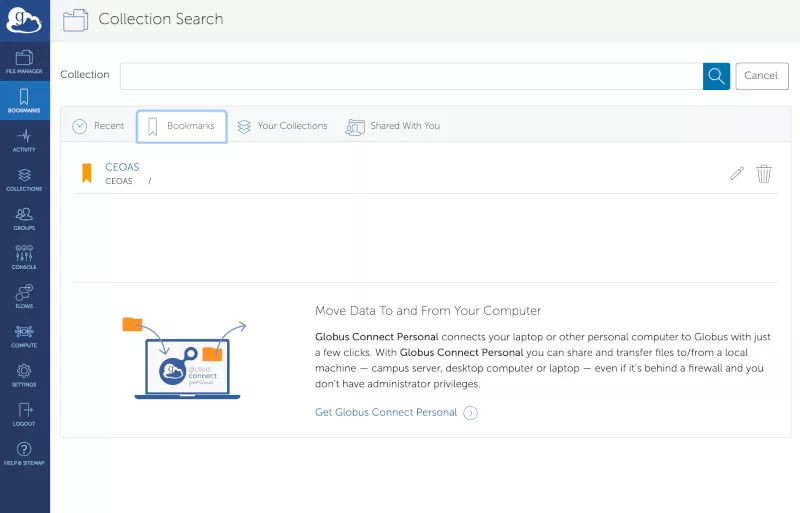
Manage Bookmarks on the Bookmarks page.
Installing and Configuring Globus Personal Connect To Create Your Own Collection
Globus Personal Connect is a software package for Windows, Mac, and Linux based systems that you install on your own computer(s) to turn them into Collections you can access via Globus. To download the software, log in to Globus and click on the Collections link in the menu on the left. At the top right of the page look for the link "Get Globus Connect Personal". Click on that and download the software for your operating system.
Follow these instructions to install the software for your specific operating system:
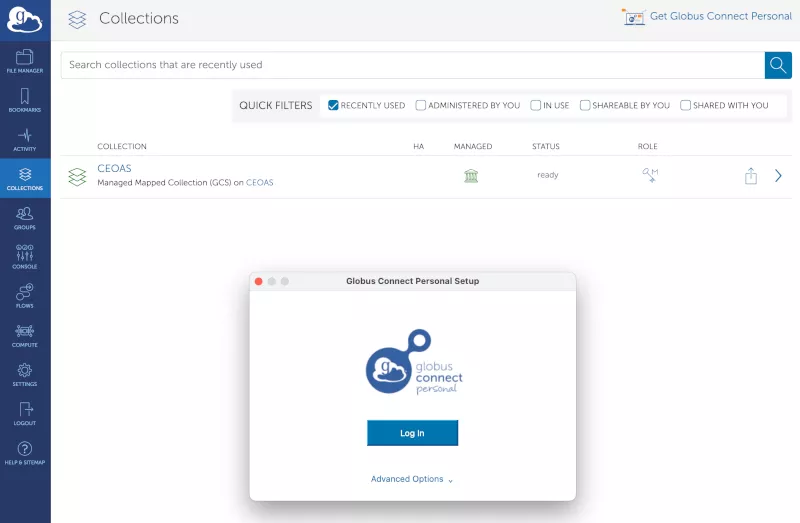
After the software has been installed, open it and you will be greeted with a window asking for you to log in.
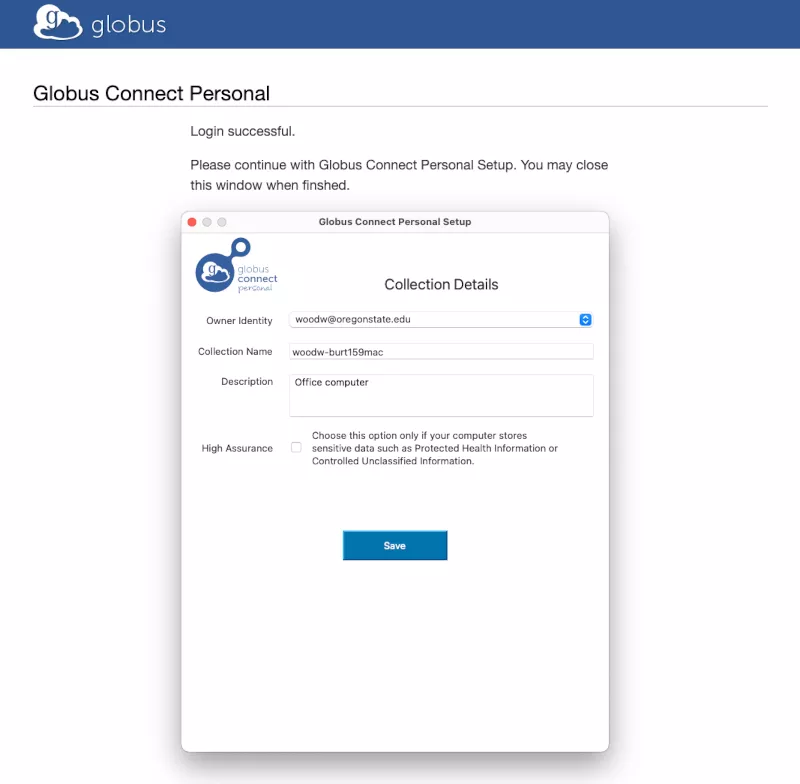
After successfully logging in, label your computer where marked. Your computer name is automatically filled in but you can change it to something different if you'd like. Then click on the "Allow" button to approve access for the Globus service on your local computer.

After approving the Globus service you will create a Collection on your local computer. Your local home directory is the default location for your local Collection. However, you can change this setting in the preferences section of the Globus Connect Personal software. For Collection Name, use a short but descriptive title. You can also add some additional details in the Description section. Do not select the "High Assurance" option as this is not a tool configured to transfer confidential/secure information. Then click "Save".
If successful, you should receive a popup that states that the setup was successful. You can then click "Exit Setup".
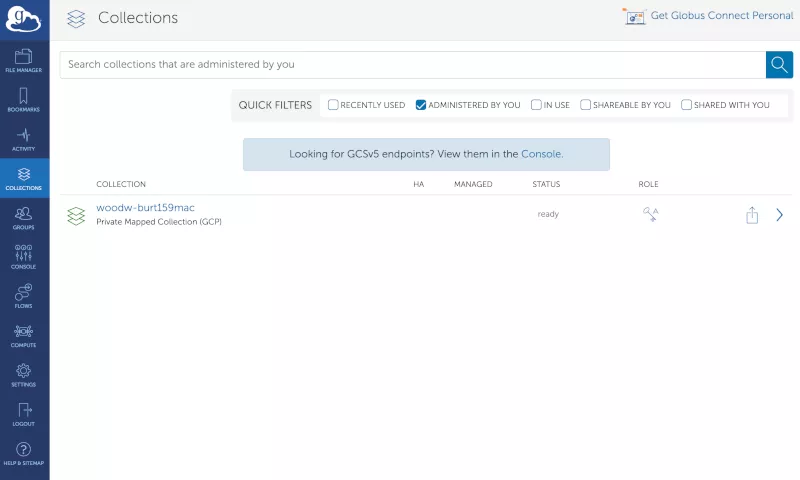
Next, in the Globus user interface on the web, click on "Collections" in the menu on the left. To find Collections you own, select the "Administered By You" Quick Filter. That will display the local collection you previously created.
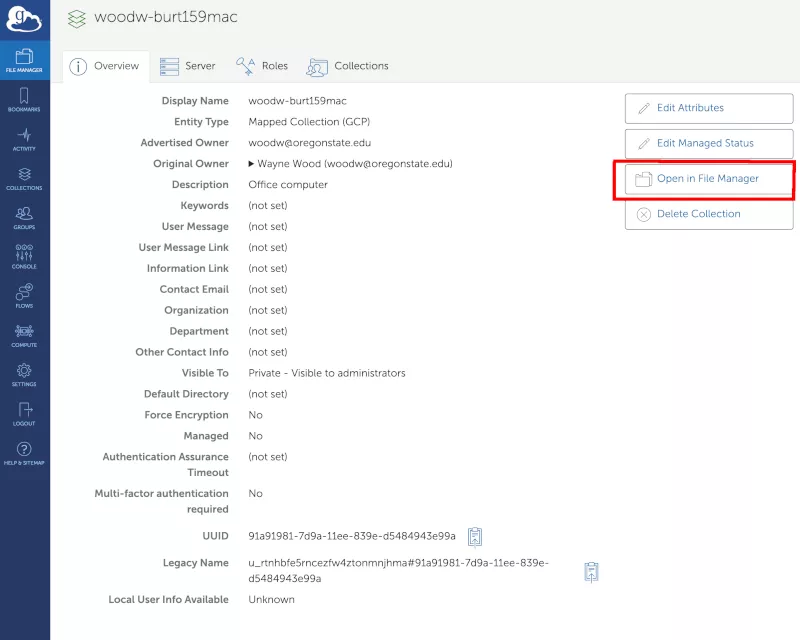
Select the Collection and then on the next page click "Open File Manager".
This will open a listing of the folders and files in the directory you've selected as your local Collection.
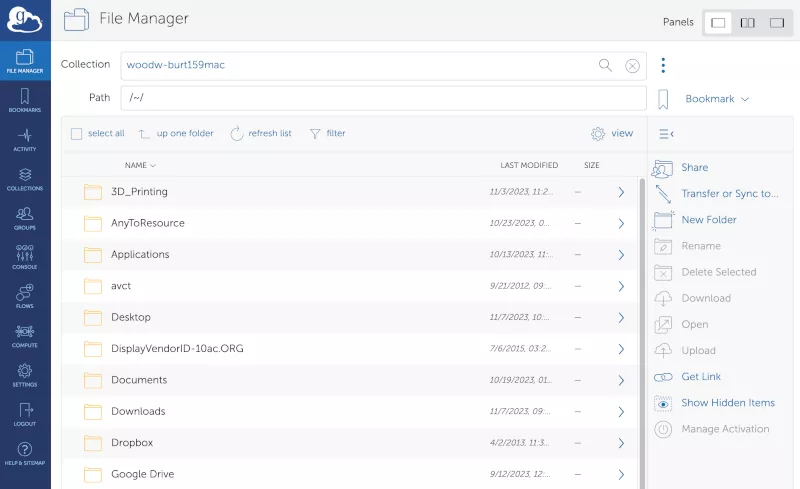
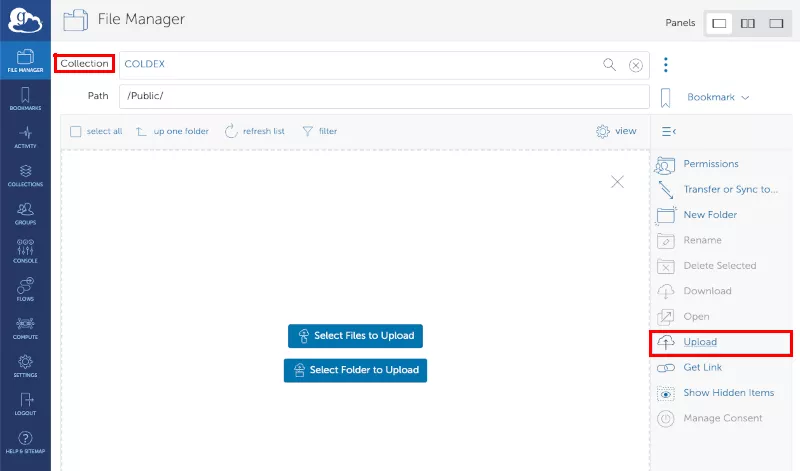
There are two ways to add files to a Collection. The first is directly uploading files using the File Manager. To do this, choose a Collection and set your Path to where you would like files to be stored then click on "Upload" in the menu to the right. If this is the first time you've uploaded a file you will be asked to allow access. Accept that and then click on "Upload" again. From there you can select to upload a single file or a folder of files. These will be saved in the Collection you have selected.
The second way to add files to a Collection is transferring files using the File Manager. The file transfer interface utilizes Panels to separate two file storage locations. These can be arranged together in a two-pane, bi-directional layout or separately with just your source or destination visible.

To begin your transfer click on "Transfer or Sync to..." in the menu on the right. This will automatically change your view to a two-pane layout. In the Collection fields select which Collection you are transferring to/from. In the Path fields set the paths to the location you would like your files transferred to/from.
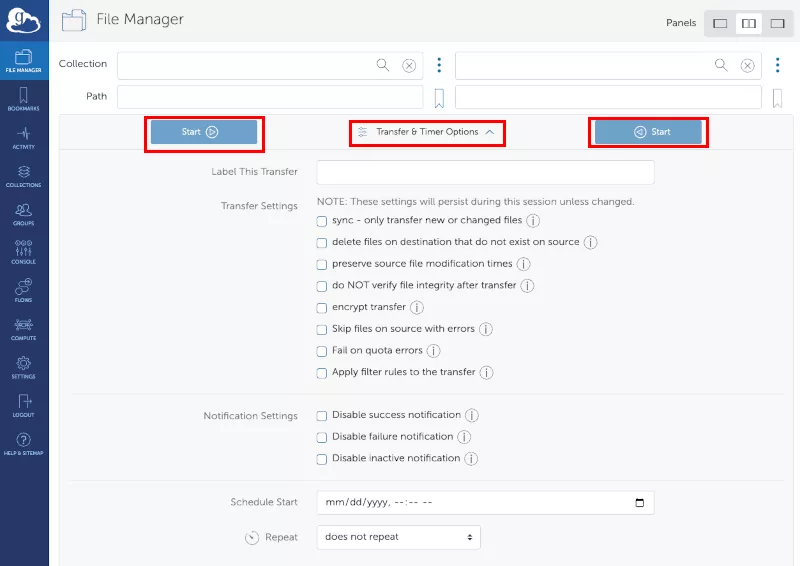
Before starting your transfer there are a number of options you can select in the "Transfer & Timer Options" menu. If you will be doing multiple transfers you can "Label This Transfer" to give it a name. You can select various synchronization options such as transfer only new items or delete files on the destination that do not exist on the source. You can preserve modification times, skip files with errors, and/or apply various filter rules to a transfer. You can also modify the notification options and schedule a transfer for a later date. Once you have decided on which options work best, close the options selection menu and click on one of the "Start" buttons. The arrow on the button denotes which direction the transfer will go.
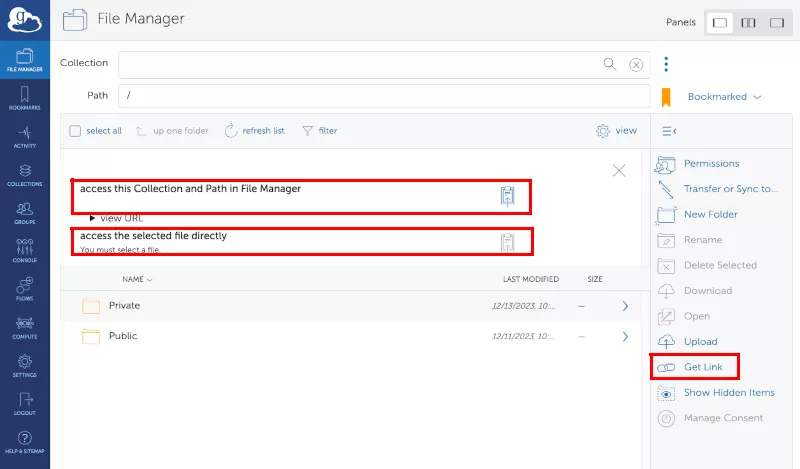
To share data you will use Links which can be created using the Globus interface. There are two types of links, the first is a link to access the document using the File Manager. The second is a link you can post on a website or send to someone via email. To create a link, click on "Get Link" in the menu on the right. Choose either "access this Collection and Path in File Manager" or "access the selected file directly". By clicking on the clipboard symbol the link is copied to your computer's clipboard.
